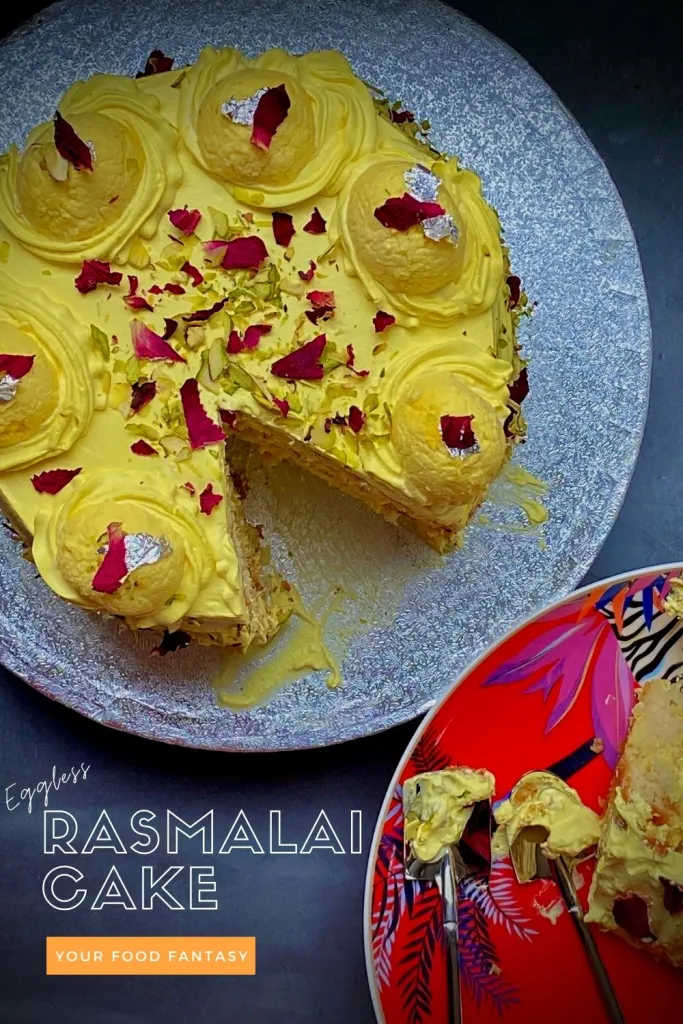
Do you love rasmalai? Do you love cakes? Rasmalai cake is the best fusion of both worlds, offering ultimate taste of rasmalai and cake, much like two in one. Making it even more enticing, this rasmalai cake recipe is egg free, yes, you read it right, its eggless!! This ras malai cake is inspired by bengali rasmalai.

Jump To
What is Rasmalai Cake
Cake with the happy fusion of traditional rasmalai is rasmalai cake. Rasmalai itself is one of the savoured Indian sweet, however when its added to the cake, it elevates the taste of the cake million times.
This cake had been trending lately in India and I really wanted to make and share the recipe of same. Finally, I got around of doing so in this year. I have to say that its one of the best fresh cream cake you can taste. Without much exaggeration, I can say that it tastes pure heavenly.
Ever since I saw ras malai cake on my Instagram feed last year, I was itching to try the cake. However, for me the challenge has been using fresh cream on my cake. Cake frosting using fresh cream is not the easiest of the task and I am gradually learning tricks to master it. If you in India, you can use non-dairy fresh cream cake, which retains the cream shape and cream does not melt. If you are one like me, staying in UK, non-dairy cream is non-existent in market, which means decor needs to be done with dairy cream. You can of course use butter cream and fondant.
My this recipe of rasmalai cake is with fresh cream, and since few of my friends do not eat eggs, I have kept this recipe as eggless.
If you new to this word, rasmalai (also spelled as ras malai) is a milk based, posh Indian dessert. It is extremely popular pan-india and now outside India too. I remember when I was growing up, it used to be my top most loved dessert, only thing that ever came close to it for me, was a good cake.
Ingredients for rasmalai cake
As the name suggests, this cake needs rasmalai as well as other baking ingredients.
- Rasmalai – We need rasmalai for two reasons. first to decorate the cake and second to provide rasmalai flavour to the cake.
- Baking Ingredients – All purpose flour, yogurt, baking powder, baking soda, butter.
- Flavouring ingredients – To enhance flavour of the cake, we need to add cardamom powder, almond extract, kewra water.
- Frosting ingredients – For frosting use whipping cream, icing sugar, rasmalai juice aka ras.
- Coloring ingredient – Organic yellow color.
- Decorating ingredient – I have used dried rose petals, sliced pistachios and silver foil for decoration. You can choose as what is available to you.

How to make Rasmalai Cake
The process of making this cake is made up of three parts.
Baking the cake
- First of all, Preheat your oven to 180 degrees C temperature for 10 minutes. Grease two 8 inch cake tins with little oil/butter and place parchment paper in the base, or you can dust with little flour after greasing with oil.
- In a mixing bowl, sieve together flour, baking powder, baking soda and salt, subsequently mix this well and keep aside.
- In another mixing bowl, beat the butter and sugar together with electric beater, on medium-high speed until they are fluffy and creamy, scraping the sides in between. Add yogurt and beat again until mixed well.
- Now add half of the flour mix and beat for 1 minute. After that, add rest of the flour mix, and milk to it and beat again so that the batter is nicely done. Add cardamom powder and almond extract now and beat again for half minute.
- Pour this batter to the baking tins dividing half in each tin. Give the tins a gentle tap, place them on the middle rack of the oven and bake for 30-35 minutes. After that check the cake by inserting a toothpick or knife in the centre, if it comes out clean then take the tins out otherwise bake for few more minutes.
- Cool the cakes on a rack in the tins for 10-15 minutes, then take them out from the tins and cool on the rack completely
Preparing frosting
- Place a mixing bowl and whisk attachments of electric beater into the fridge to chill them and get ready for whipping cream.
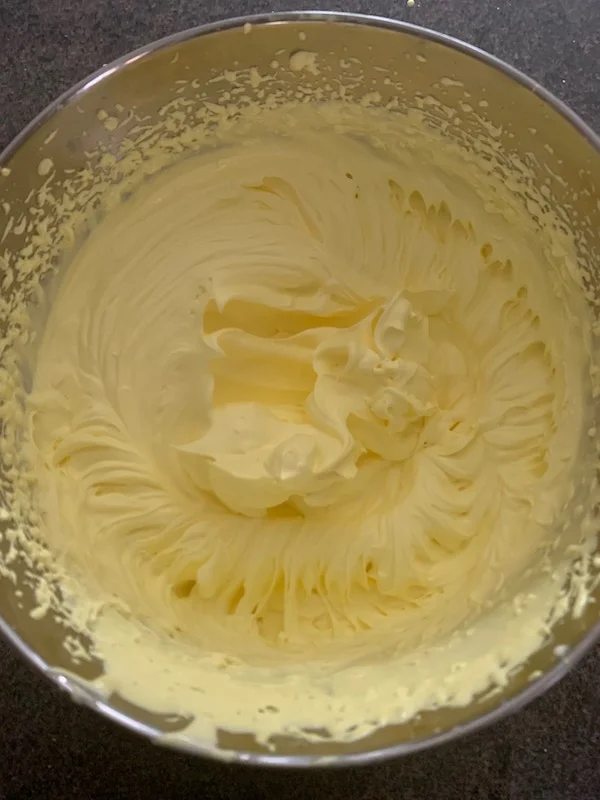
- Take the mixing bowl and attachments out of fridge and add the whipping cream. Start whipping it on medium high speed until soft peaks occur. Add icing sugar, kewra water, little ras from rasmalai and 5-6 drops of yellow food colour.
- Start whipping the cream on low speed to mix the sugar, then increase the speed to medium-high and whip until stiff peaks occurs. Do not over beat otherwise it will turn into butter. Refrigerate the cream for 10 minutes.
Assembling and decorating the cake
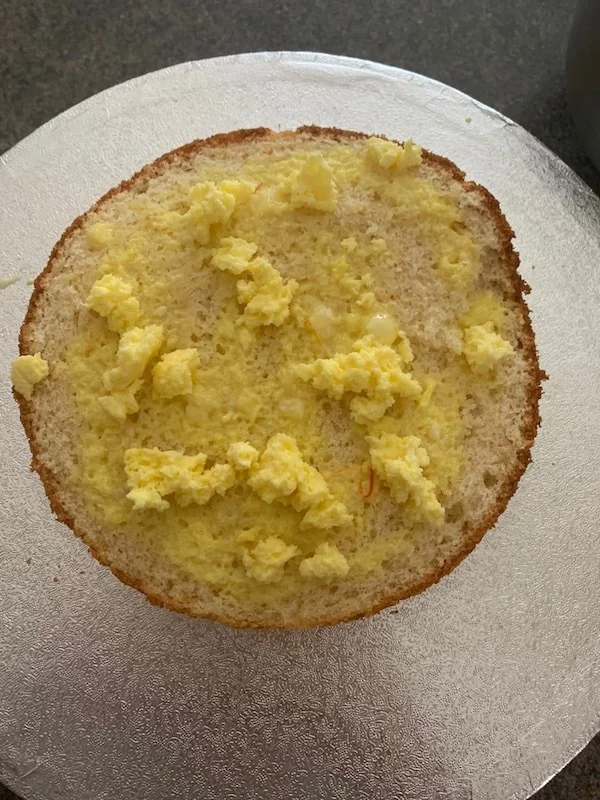
- Once the cakes are completely cooled, divide both of them into 2 layers with the help of a knife or cake slicer. This way we will have 4 pieces of cake altogether. Separate Rasmalai pieces and ras in 2 bowls. Squeeze extra ras from pieces of rasmalai, and crumble them into small pieces.
- Now, take a cake board and put a tablespoon of whipped cream on it and spread a little. Place the first layer of cake on it. Spread 1 tablespoon of ras (milk from rasmalai) all over it. Now spread crumbled rasmalai pieces over the cake layer and then cover the layer with whipped cream in circular motions. Smooth it with a spatula or cake decorating knife.
Ras malai Cake Prep 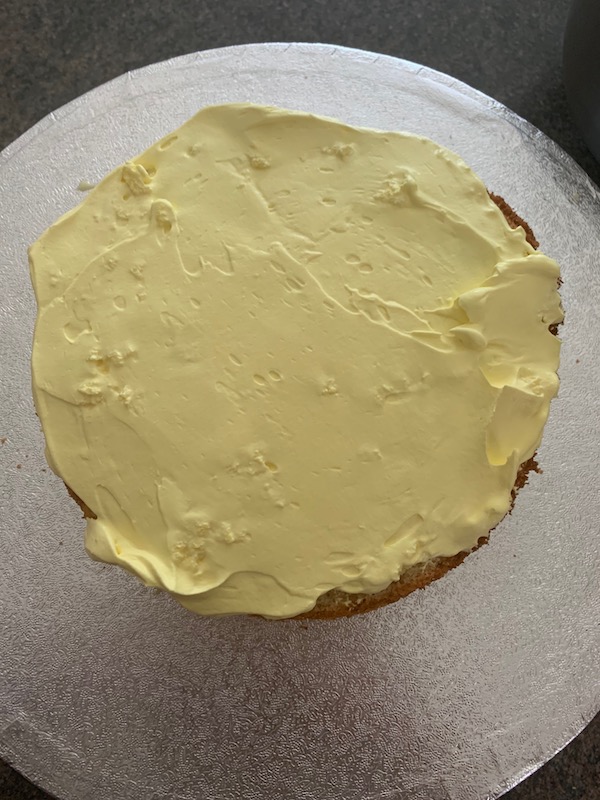
Adding layers of frosting in the cake
- Place the second layer of cake and repeat the same process. Once the second layer is covered and smooth, place the third layer and repeat the process again.Now place the 4th and final layer and repeat the process of spreading ras all over it. Start spreading little whipped cream all over and smooth with spatula. Place the cake in fridge for 10-15 minute.
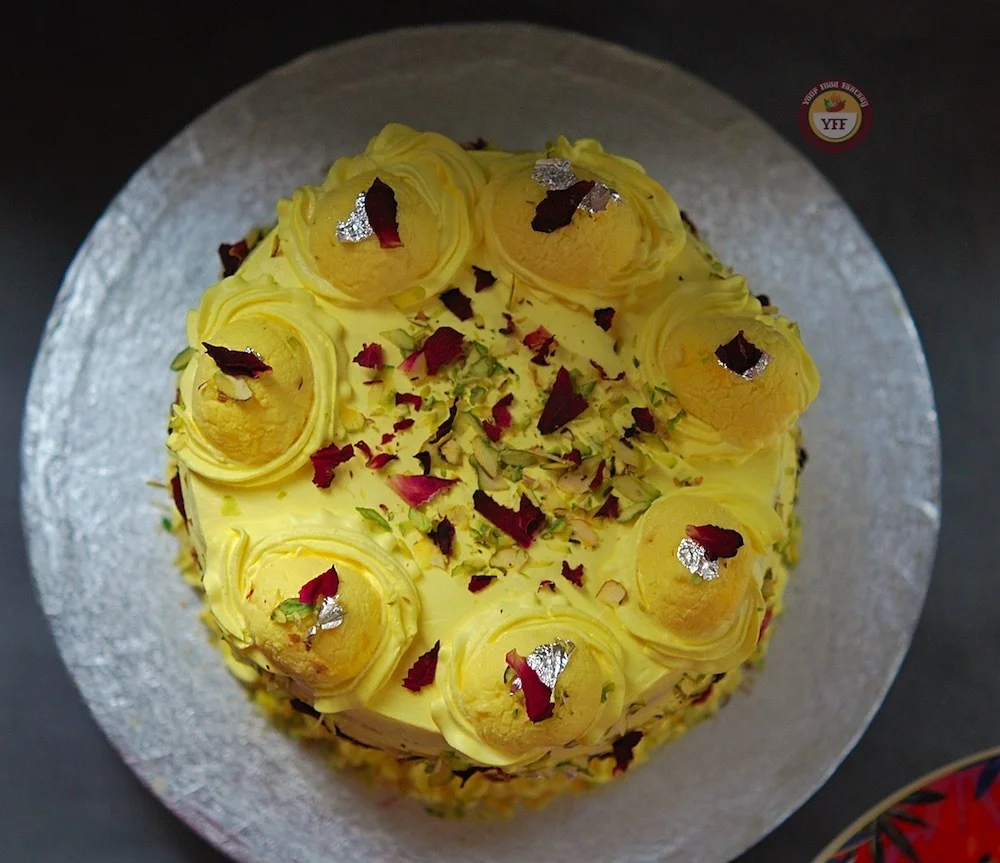
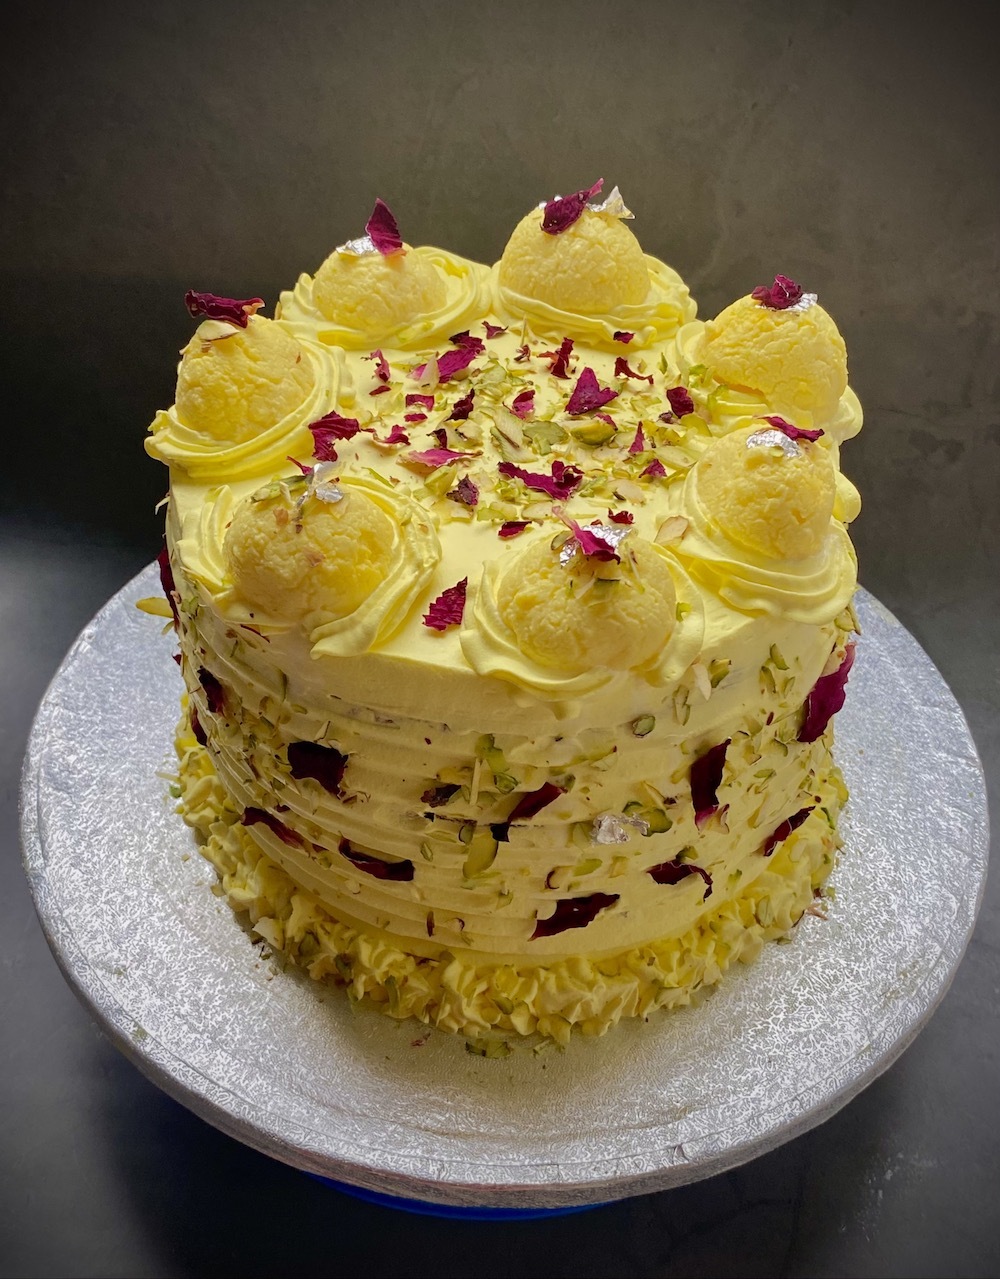
- After that, take it out and apply more whipped cream all over the cake and smooth out the edges. Transfer the remaining cream into a piping bag fitted with any nozzle of your choice. Here, I have used Wilton 1M nozzle. Decorate the cake with cream rosettes or any other design.
- After that, place few pieces of rasmalai on top, and garnish the cake with sliced pistachios and rose petals. Place the cake in fridge for sometime before serving.
Pro Tips for making Rasmalai cake
- If you wish to save time, you can buy rasmalai from store, or make rasmalai a day before by planning ahead. Chill the rasmalai in fridge before using in cake
- You can check if your cream is ready by inverting bowl if the cream stays intact without showing signs of slipping from the bowl, it’s done. Or you can move a spoon base, on cream and lift the spoon, if the cream sticked on spoon base doesn’t seems to be floppy when you shake spoon, thats when its done.
- Process of making whipping cream from soft peaks to stiff peaks need proper attention. Be cautious, as you definitely don’t want to end up separating butter.
- Check the cake is baked well, by inserting a toothpick or knife in the centre, if it comes out clean then take the tins out otherwise bake for few more minutes.
- Slice cake, only when it has cooled to room temperature.
- Your whipping cream needs to be cold, do not over beat otherwise it will turn into butter. Give ice bath, while whipping cream. Keep cream in fridge for 10 mins to keep it cool before you start decorating. Fresh cream melts with heat (even with heat of hands), hence it must be kept cold.
- Once cake is ready, keep it in fridge for few hours.
- If you have access to non-dairy cream, use it. Non-dairy cream offer smooth finish and glossy look, as compared to whipped dairy cream.
Why to make or have this rasmalai cake?
- Is absolutely ambrosial! Totally bursting with flavours, pleasing to tastebuds
- Eggless and easy to make
- Can be made in advance for that feast night, just the perfect dessert for celebrations
- Totally adored by kids and adults, yet to meet someone who has not loved this ras malai cake
Serving suggestion
Cut a slice of this ras malai cake, as meaty or as lean as you wish and serve cold as part of dessert. Make sure you tell your guests to keep space in their tummy as they will need more of this cake, one slice is never enough!
Cake lover?
If you have weakness for cakes, you may like to explore some of these cake recipes
Blackberry Chocolate Cake
Orange Pistachio Cake
Carrot Cake
Gulab Jamun Cake
Other Ras Malai Cake Designs
There is no end to imagination on how a ras malai cake design should look like. If you looking for some design inspiration, you may check some designs, made by me.
Recipe Card
Rasmalai Cake
Equipment
- 2 baking tin of 8 inch each
Ingredients
- 250 gram All purpose flour/Maida
- 250 gram Sugar
- 200 gram Unsalted Butter
- 2/3 cup Yogurt
- 1.5 teaspoon Baking powder
- 1/3 teaspoon Baking Soda
- 1/4 teaspoon salt
- 1/3 teaspoon Cardamom powder
- 1/3 teaspoon Almond extract
- 1/2 cup Milk
- 3 Cup Whipping cream
- 4 tbsp Icing Sugar
- 1 teaspoon Kewra water
- 1/3 teaspoon Yellow food colour
- 300 gram Rasmalai
- 1/3 cup sliced pistachios
- 2 tbsp Rose petals
Instructions
- In a mixing bowl, sieve together flour, baking powder, baking soda and salt. Mix them well and keep aside.
- In another mixing bowl, beat the butter and sugar together with electric beater, on medium-high speed until they are fluffy and creamy, scraping the sides in between. Add yogurt and beat again until mixed well.
- Now add half of the flour mix and beat for 1 minute. After that, add rest of the flour mix, and milk to it and beat again so that the batter is nicely done. Add cardamom powder and almond extract now and beat again for half minute.
- Pour this batter to the baking tins dividing half in each tin. Give the tins a gentle tap, place them on the middle rack of the oven and bake for 30-35 minutes. After that check the cake by inserting a toothpick or knife in the centre, if it comes out clean then take the tins out otherwise bake for few more minutes.
- Place a mixing bowl and whisk attachments of electric beater into the fridge to chill them and get ready for whipping cream.
- Cool the cakes on a rack in the tins for 10-15 minutes, then take them out from the tins and cool on the rack completely.
- Take the mixing bowl and attachments out of fridge and add the whipping cream. Start whipping it on medium high speed until soft peaks occur. Add icing sugar, kewra water, little ras from rasmalai and 5-6 drops of yellow food colour.
- Start whipping the cream on low speed to mix the sugar, then increase the speed to medium-high and whip until stiff peaks occurs. Do not over beat otherwise it will turn into butter. Refrigerate the cream for 10 minutes.
- Once the cakes are completely cooled, divide both of them into 2 layers with the help of a knife or cake slicer. This way we will have 4 pieces of cake altogether. Separate Rasmalai pieces and ras in 2 bowls. Squeeze extra ras from pieces of rasmalai, and crumble them into small pieces.
- Now, take a cake board and put a tablespoon of whipped cream on it and spread a little. Place the first layer of cake on it. Spread 1 tablespoon of ras(milk from rasmalai) all over it. Now spread crumbled rasmalai pieces over the cake layer and then cover the layer with whipped cream in circular motions. Smooth it with a spatula or cake decorating knife.
- Place the second layer of cake and repeat the same process. Once the second layer is covered and smooth, place the third layer and repeat the process again. Now place the 4th and final layer and repeat the process of spreading ras all over it. Start spreading little whipped cream all over and smooth with spatula. Place the cake in fridge for 10-15 minute.
- After that, take it out and apply more whipped cream all over the cake and smooth out the edges. Transfer the remaining cream into a piping bag fitted with any nozzle of your choice. Here, I have used Wilton 1M nozzle. Decorate the cake with cream rosettes or any other design.
- After that, place few pieces of rasmalai on top, and garnish the cake with sliced pistachios and rose petals. Place the cake in fridge for sometime before serving.Enjoy…


Video
Notes
- You can check if your cream is ready by inverting bowl if the cream stays intact without showing signs of slipping from the bowl, it’s done. Or you can move a spoon base, on cream and lift the spoon, if the cream sticked on spoon base doesn’t seems to be floppy when you shake spoon, thats when its done.
- Prepare rasmalai in advance for this cake as it needs to be chilled before using in cake.
- Process of making whipping cream from soft peaks to stiff peaks need proper attention. Be cautious, as you definitely don’t want to end up separating butter.
- You can bake cake in a single tin of big size and can have only 2 layers.
What is the tin size
Hi Sushma,
Tin of 8 inch each.